Taming the 'Hell' Puzzle: One Fork, Seven Minutes
When candidate reduction demands a dozen advanced techniques, ibtree finds an elegant path through a single well-chosen assumption.
In this study
01 · Challenge
The challenge
Today's puzzle carries a Hell rating — level 9, with an SE rating of 7.1 and a hodoku value of 3100. A seasoned solver spent two hours working through candidate reduction, struggling to eliminate candidates even after applying swordfish (twice), 5-y-wing, 3d-medusa (three times), AIC-ring, w-wing, and xyz-wing. The puzzle resisted every orthodox approach.
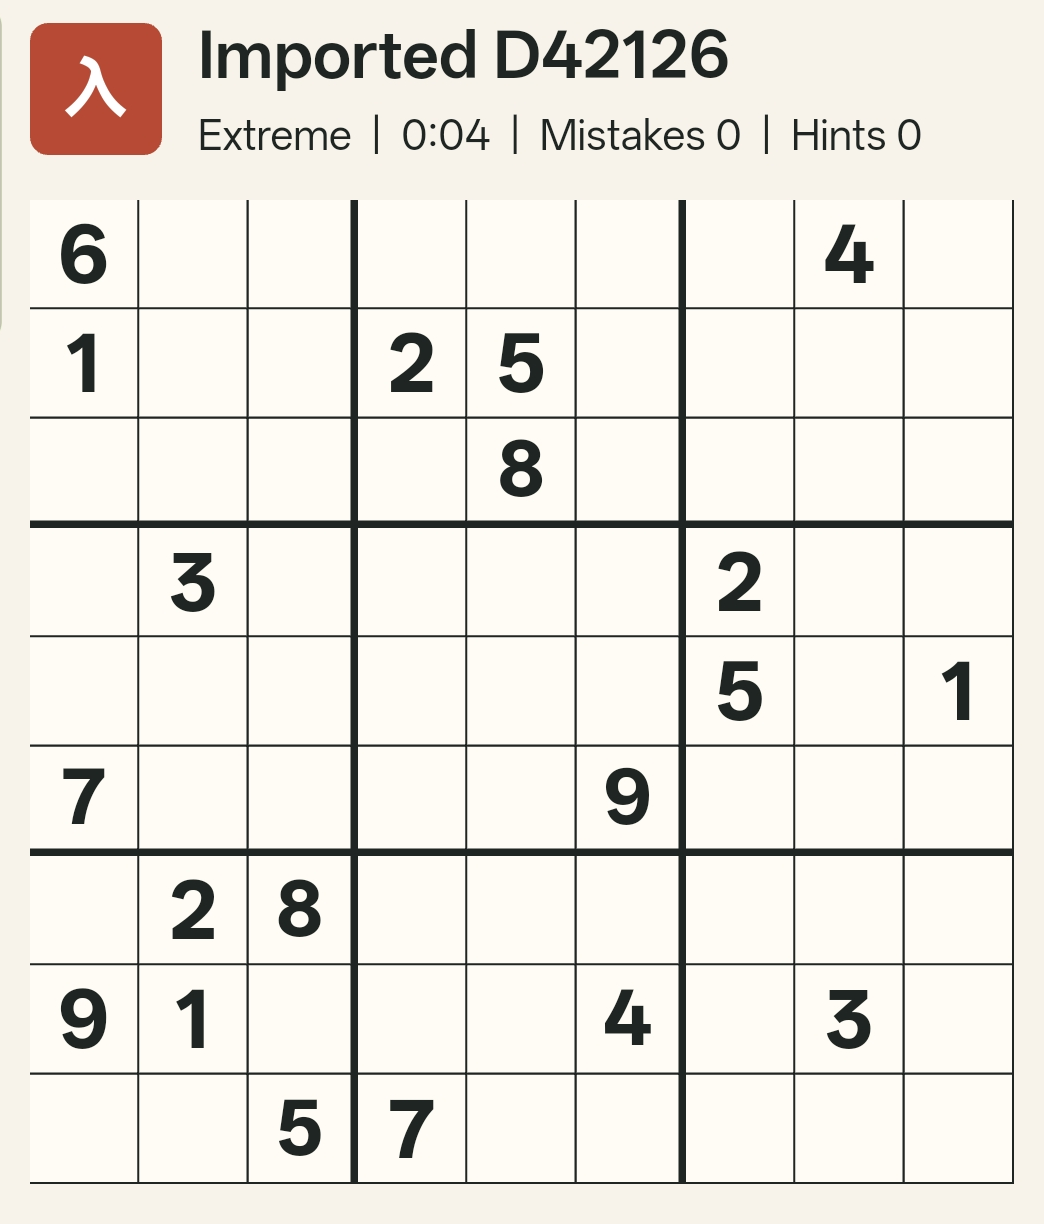
Yet ibtree — the method built around choosing one candidate, assuming it's true or false, and tracing forward to a proof by contradiction — found an elegant solution in seven minutes. No catalog of named techniques required, no memorized patterns, just one well-chosen fork and the discipline to follow it through.
02 · Knight
Spotting the knight
After placing a few singles and a naked pair using basic Sudoku rules, the solver examined Box 4 (the middle-left box). Two cells in that box could hold 5: one in the upper-left corner of the box, one in the row below and one column to the right — the familiar knight's-move formation we've seen in prior lessons.
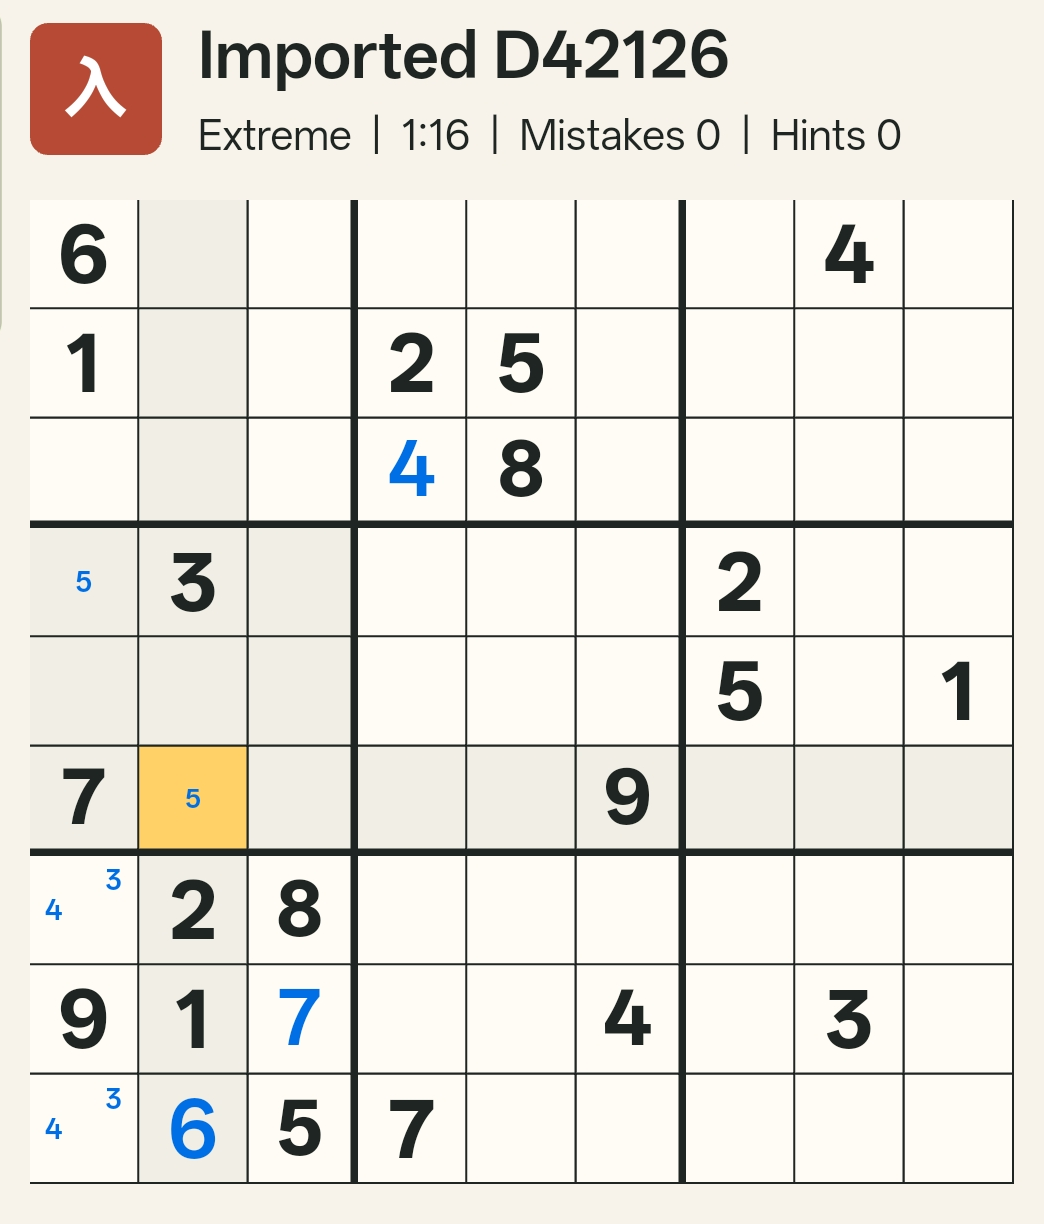
The question: which branch to explore first? A quick visual scan suggested both candidates could generate long chains, but one looked more promising — the candidate that would immediately engage multiple other digits across the grid, opening more forced moves.
03 · Branch
Choosing the branch
The Orbace rule for choosing a branch: pick the candidate that looks likely to produce the longer chain. Longer chains mean more interactions, more opportunities for a contradiction to surface if the assumption is wrong. In this case, one of the two 5s appeared to ripple further across the board once placed.
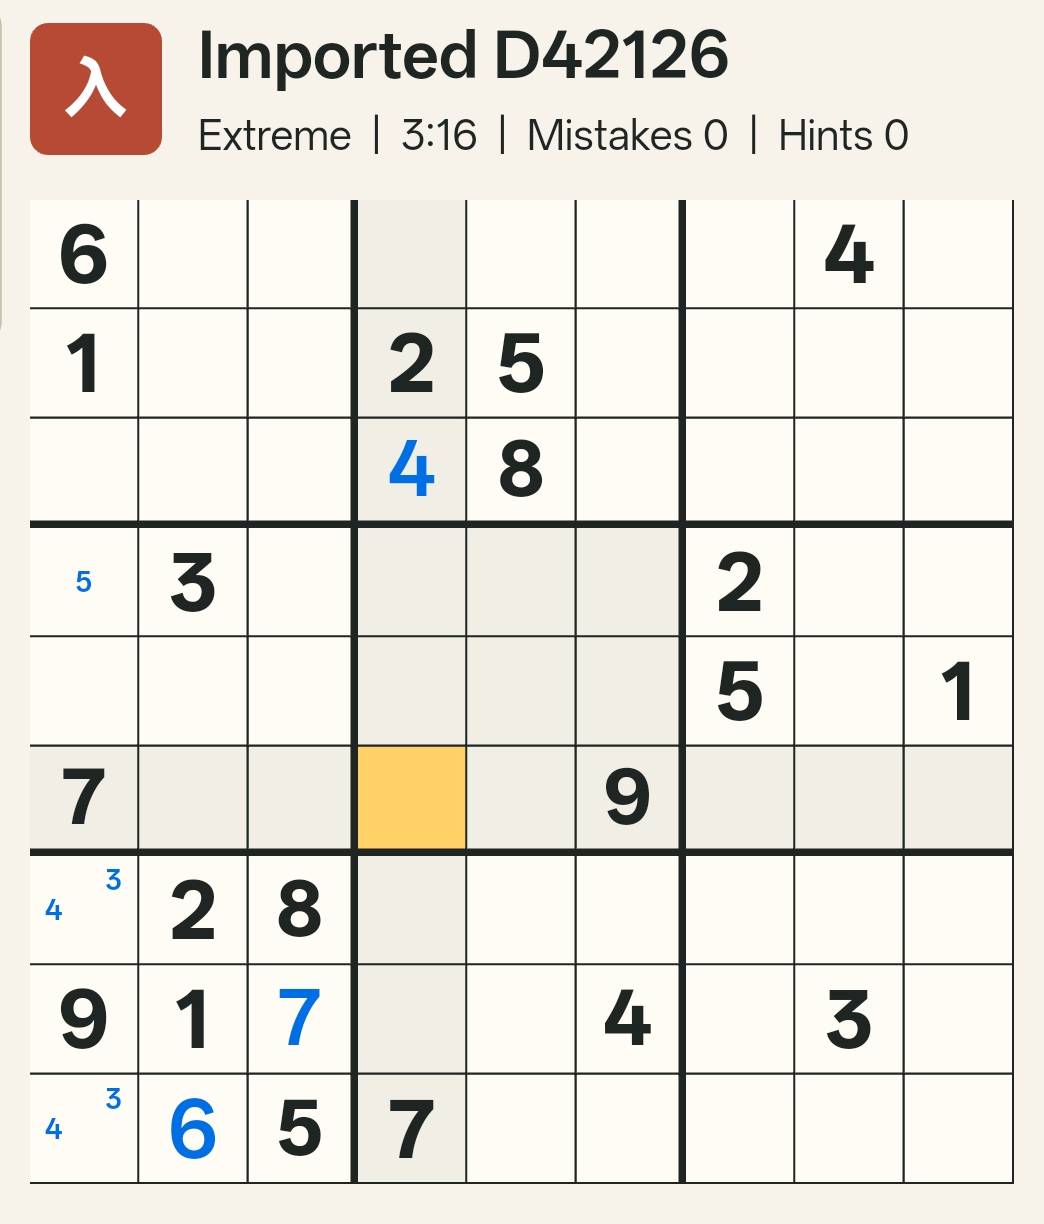
The solver assumed this candidate was true and began tracing the consequences. Each placement forced by that assumption was recorded — not written into the grid as permanent, but tracked as part of the hypothetical chain.
04 · Chain
The chain unfolds
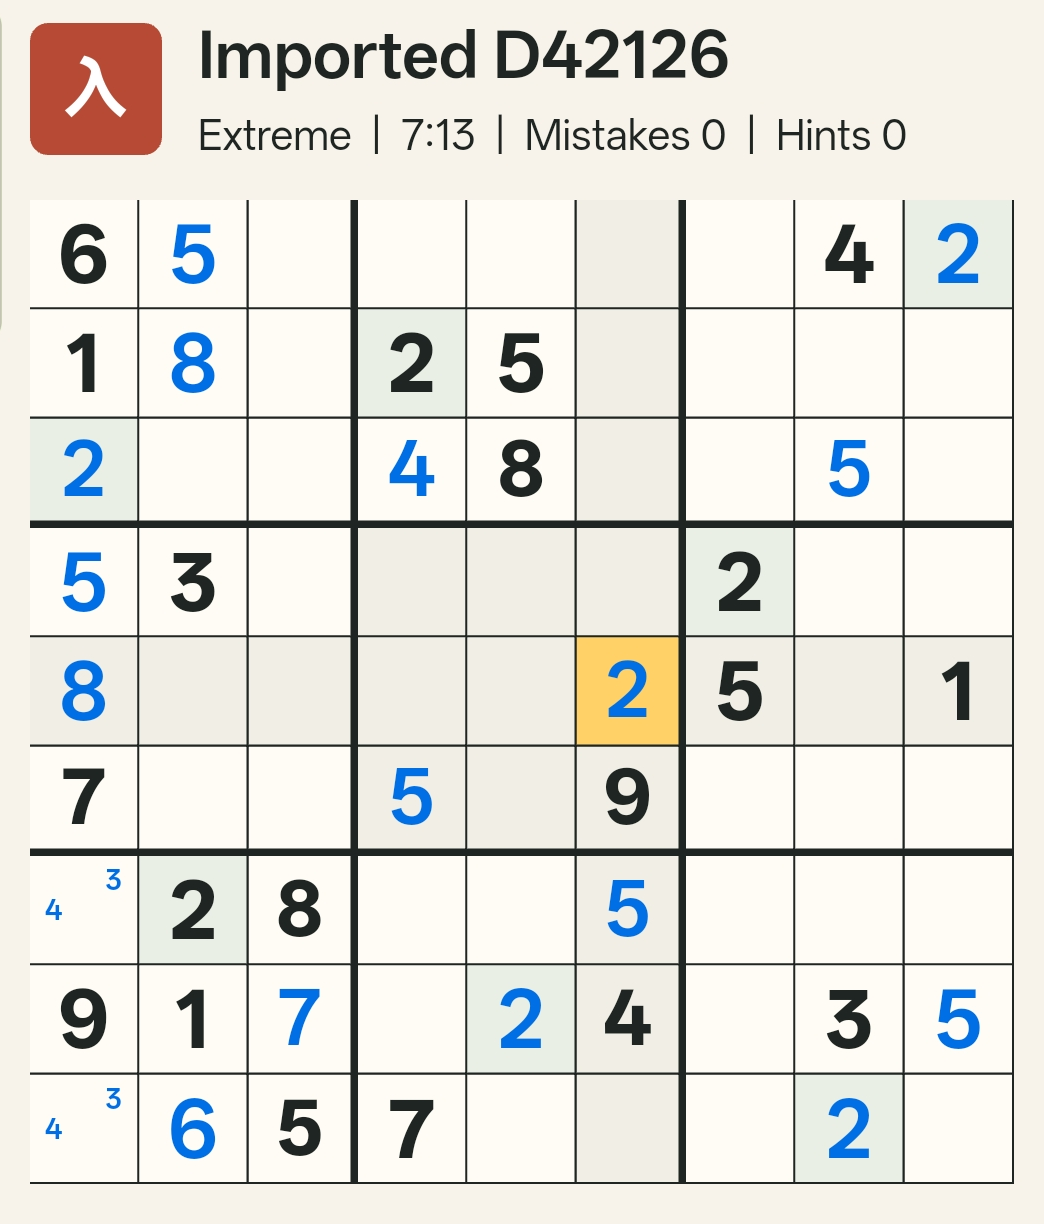
The chain grew quickly. The assumed 5 eliminated candidates in its row, column, and box, forcing placements elsewhere. Those placements in turn forced others. The solver followed the thread, cell by cell, digit by digit, watching for the moment when two forced placements would collide — when the same cell would be required to hold two different digits, or when a row, column, or box would have no legal home left for a particular number.
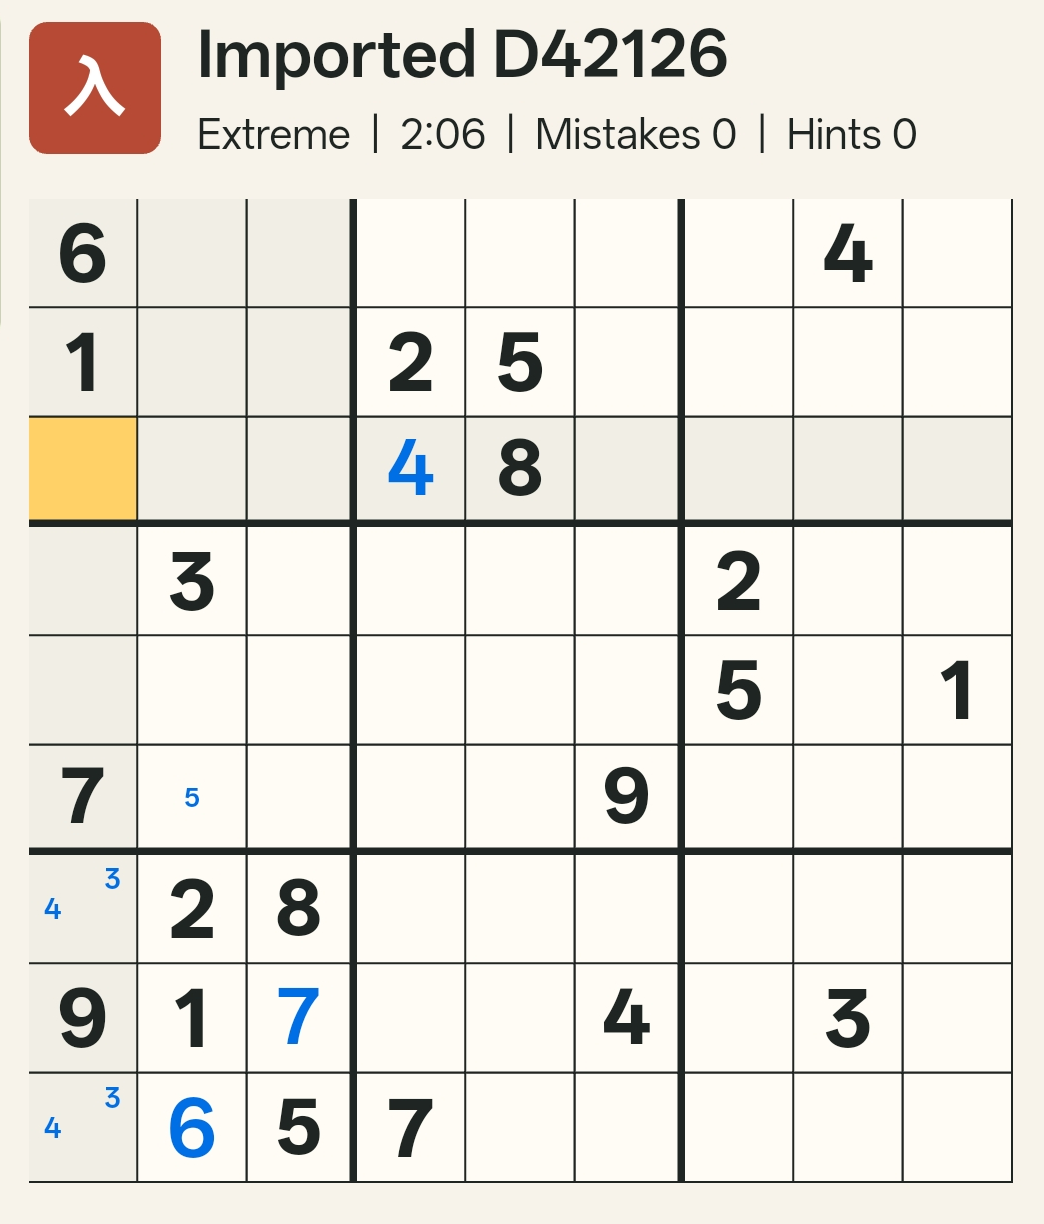
The chain looped around the board — a "go-around-the-board maneuver," as the solver described it. Digits cascaded across boxes, clearing candidates, locking in singles. The grid filled in rapidly under the weight of the assumption.
05 · Conflict
Contradiction found
Then, in Box 8 (the bottom-middle box), the contradiction appeared: the digit 2 had no legal cell left to occupy. Every candidate for 2 in that box had been eliminated by prior forced moves in the chain. The assumption had led to an impossible state.
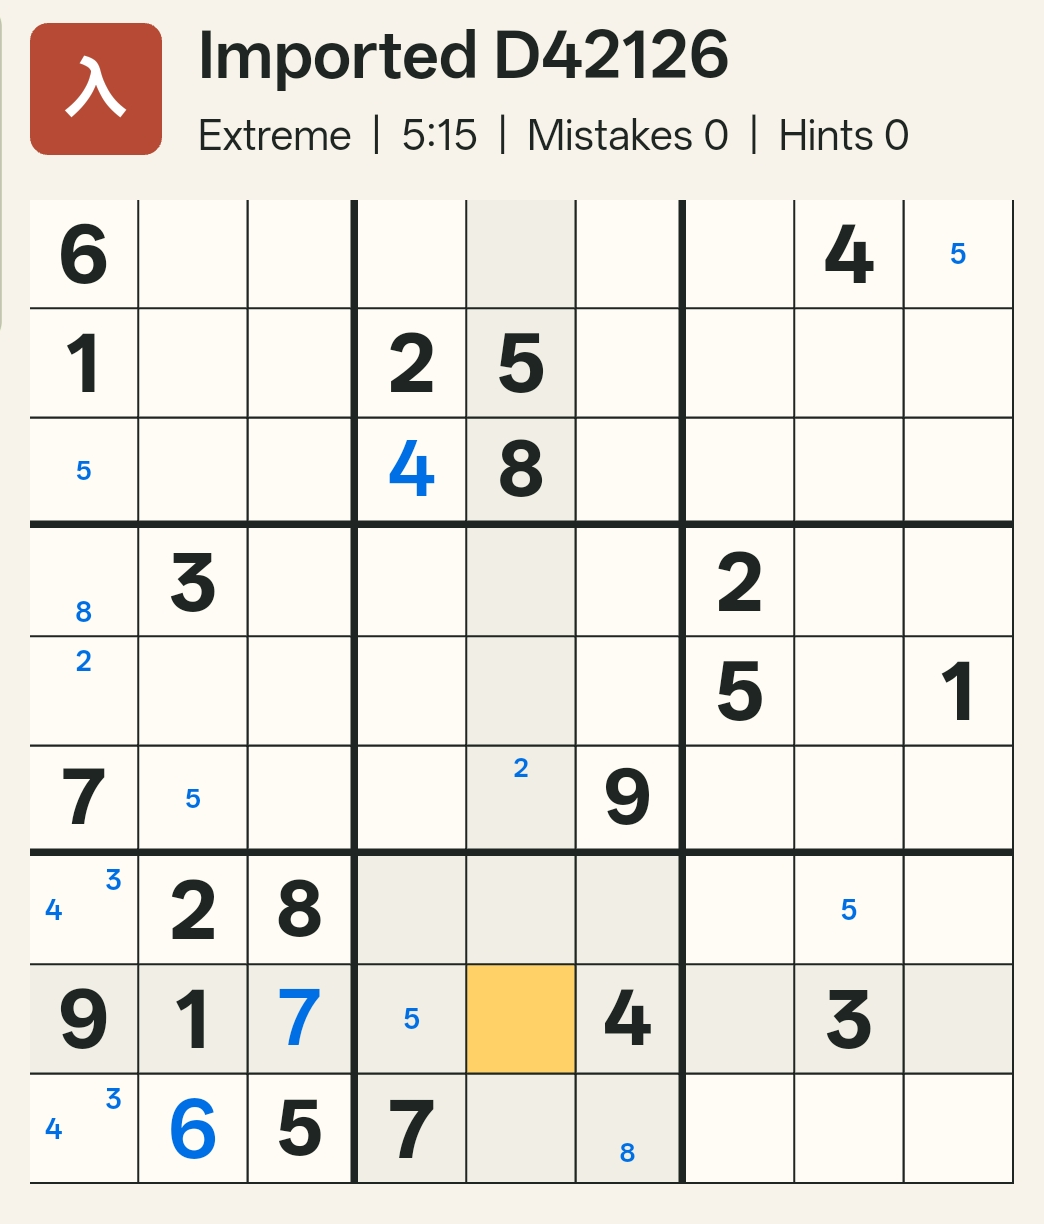
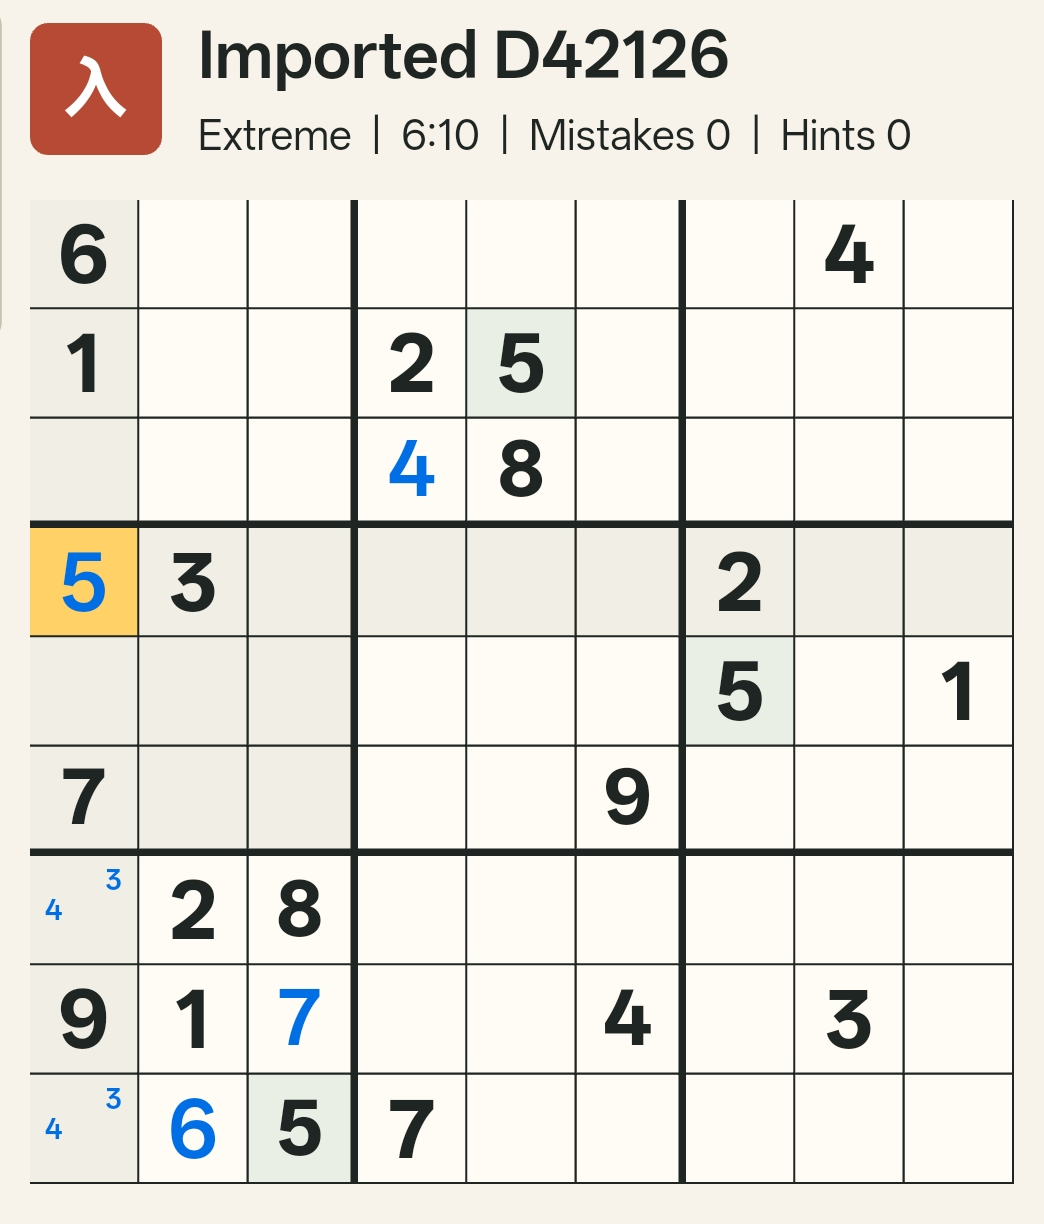
That contradiction proved the original assumption was false. The candidate the solver had assumed true could not be true — if it were, the puzzle would be unsolvable. Therefore, the other candidate in the knight formation — the one not yet explored — must be the correct placement.
06 · Smooth
The rest is smooth
With the correct 5 now known and placed, the rest of the puzzle unraveled smoothly. The single placement unlocked a cascade of singles and basic techniques — no advanced patterns required. The grid that had resisted two hours of candidate reduction yielded in minutes once the fork was resolved.
07 · Why
Why ibtree wins
This puzzle demonstrates ibtree's strength against extreme-difficulty grids. Where candidate reduction demands fluency in a dozen named techniques — recognizing swordfish, medusa coloring, AIC chains, and more — ibtree requires only one skill: the ability to choose a promising fork, assume one branch, and trace it forward with strict logical discipline.
The ibtree advantage on hard puzzles: As difficulty increases, the number of advanced candidate-reduction techniques needed grows exponentially. Ibtree's toolset stays constant — one fork, one assumption, one traced chain. The method doesn't scale in complexity as the puzzle does.
| Ibtree | Candidate reduction |
|---|---|
| One technique (fork + trace) applied repeatedly | Requires fluency in many named patterns (swordfish, y-wing, medusa, AIC, etc.) |
| Works identically on easy and extreme puzzles | Easy puzzles need only singles; extreme puzzles demand advanced pattern recognition |
| Finds the breakthrough placement directly | Must eliminate candidates incrementally, hoping to reach a single |
| Seven minutes on this Hell-rated grid | Two hours of struggle, still incomplete |
The question posed at the end of the solve session — "Any feedback on how to spot this kind of opportunity when you are solving a sudoku puzzle?" — has a straightforward answer: look for knight formations (or any other two-candidate situation in a house) early, especially after you've placed a few singles. Don't wait until candidate reduction stalls. The fork is your opening move, not your last resort.
Try it in your next Hell puzzle
Spot the knight, pick the promising branch, trace the chain. No pattern library required — just one fork and the discipline to follow it through.
Open Tea Moment