A Puzzle Worth Remembering: Beauty Meets Ibtree
When a Hell-tier puzzle's elegant initial state meets the ibtree method's sharp forks, even a Hodoku 7820 becomes a study in creative leverage.
In this study
01 · Unforgettable
An Unforgettable Grid
Most Sudoku puzzles blur together in memory — a precise grid is either correct or it isn't, and misremembering a single digit makes it a different puzzle entirely. But some initial states carry such visual elegance that they lodge themselves in your mind.
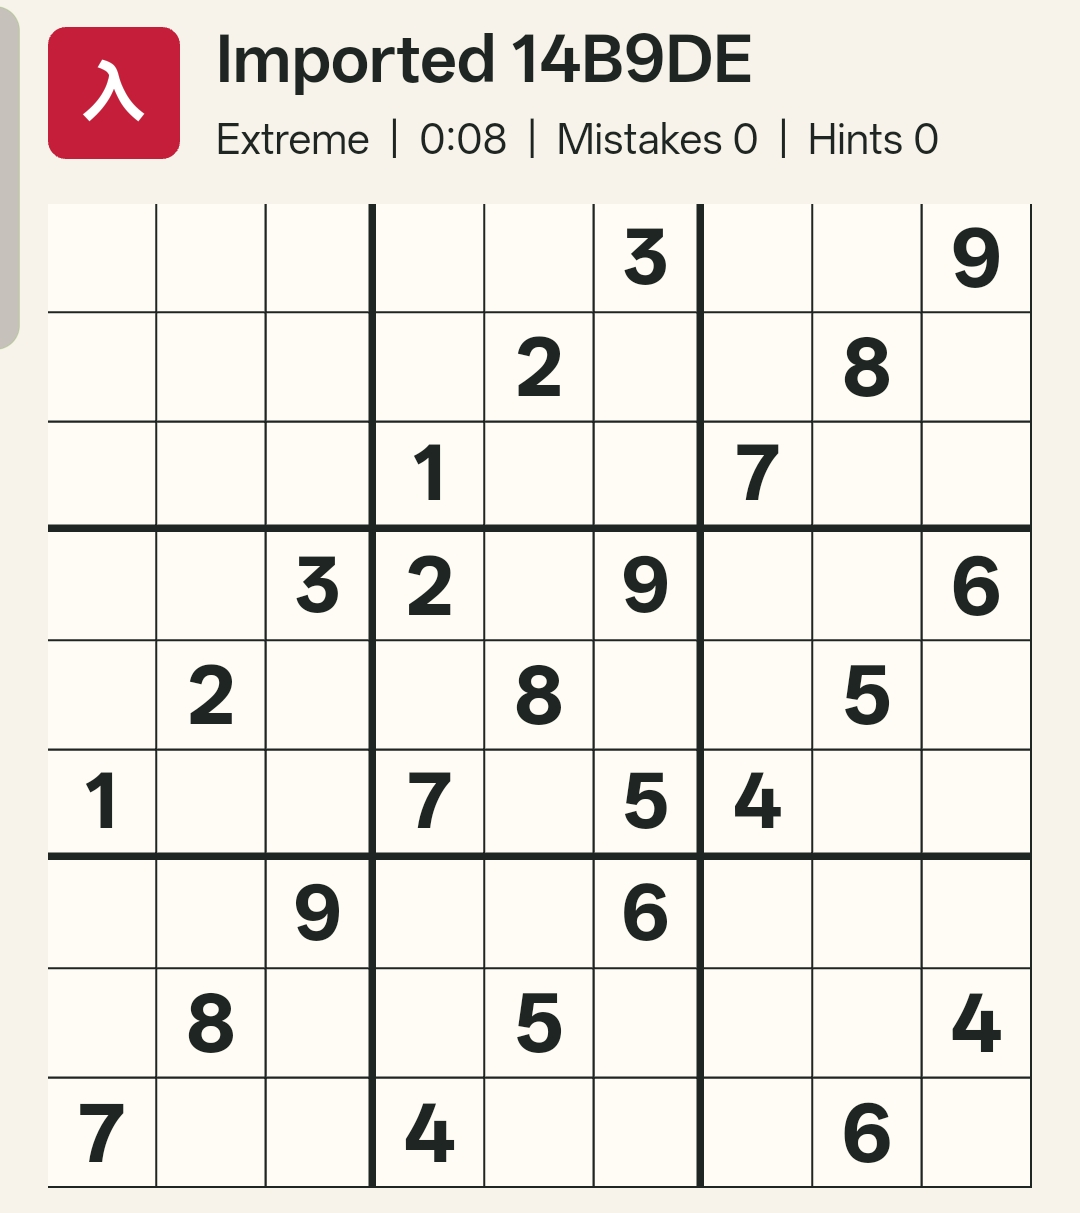
Underneath that surface beauty lies a Hell-tier beast. This puzzle carries a Hodoku rating of 7820 and a Sudoku Explainer (SE) score of 7.2 — both firmly in the expert range. The canonical candidate-reduction path demands swordfishes, 3D Medusa coloring, alternating inference chains, and an assortment of wing patterns. And there's no easy opening — no straightforward number falls into place with basic cross-hatching alone.
Why not approach it with the ibtree method instead — and a little creative leverage?
02 · Fork
First Fork: Box 4's Nine
Scanning box by box, one pattern emerges clearly: in Box 4, the digit 9 has exactly two possible homes.
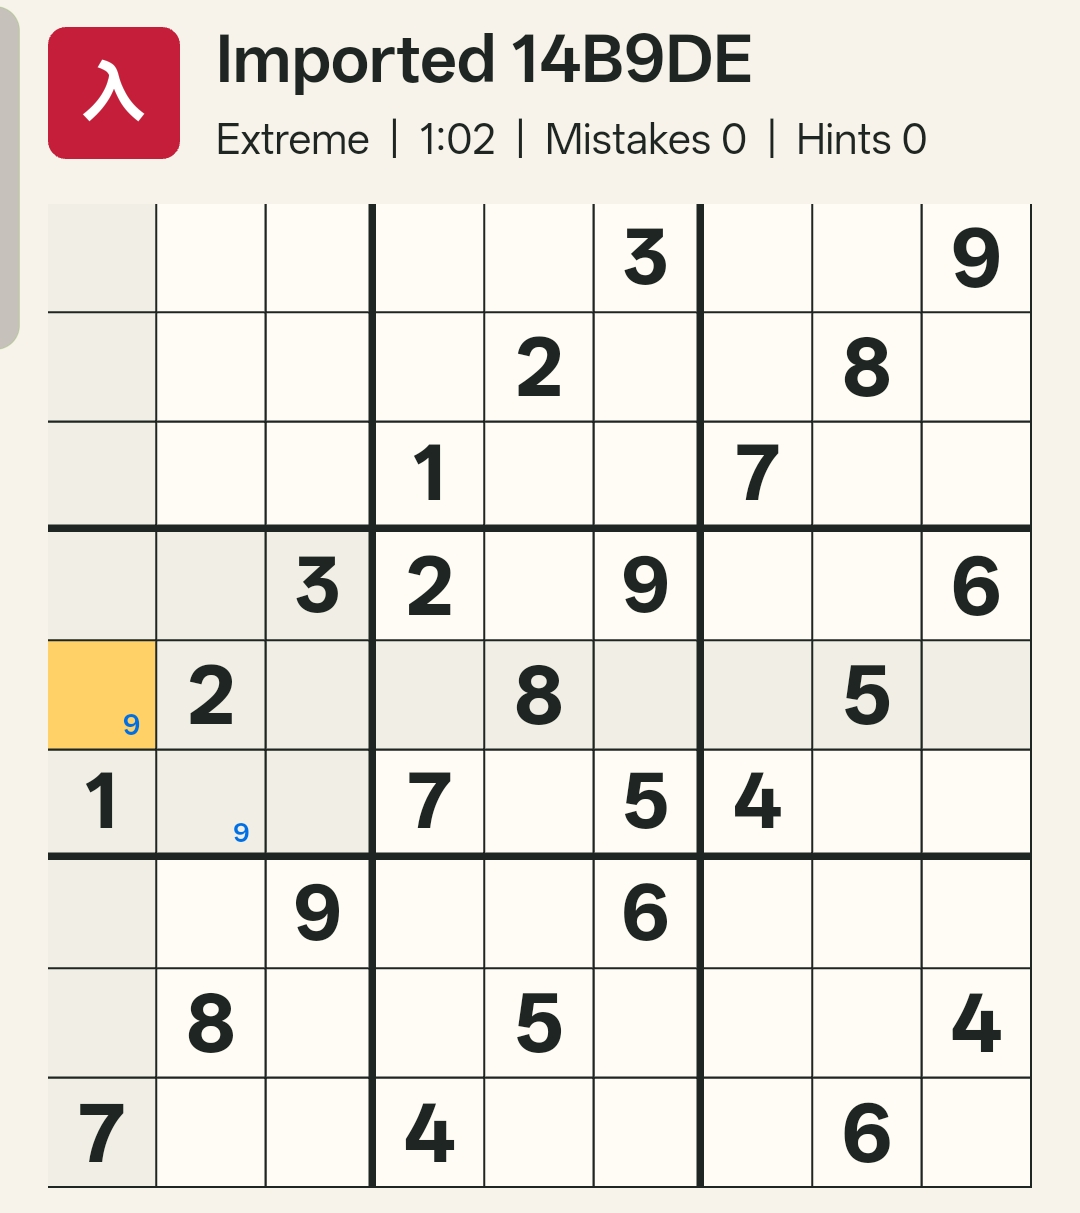
A brief visual trace reveals that both candidates can trigger long chains — but one of them is more immediately engaging. If you place 9 in the second row of Box 4, it sets off a cascade that brings other digits around the board into play, leveraging positional clues that would otherwise sit dormant. This is the candidate worth testing.
03 · Chain
The False Chain Unfolds
Marking this assumption with a pencil (small-number notation), the cascade begins. Cross-hatching alone — no advanced techniques needed — fills in placement after placement. The chain runs smoothly through several boxes, each step forcing the next with clean logic.
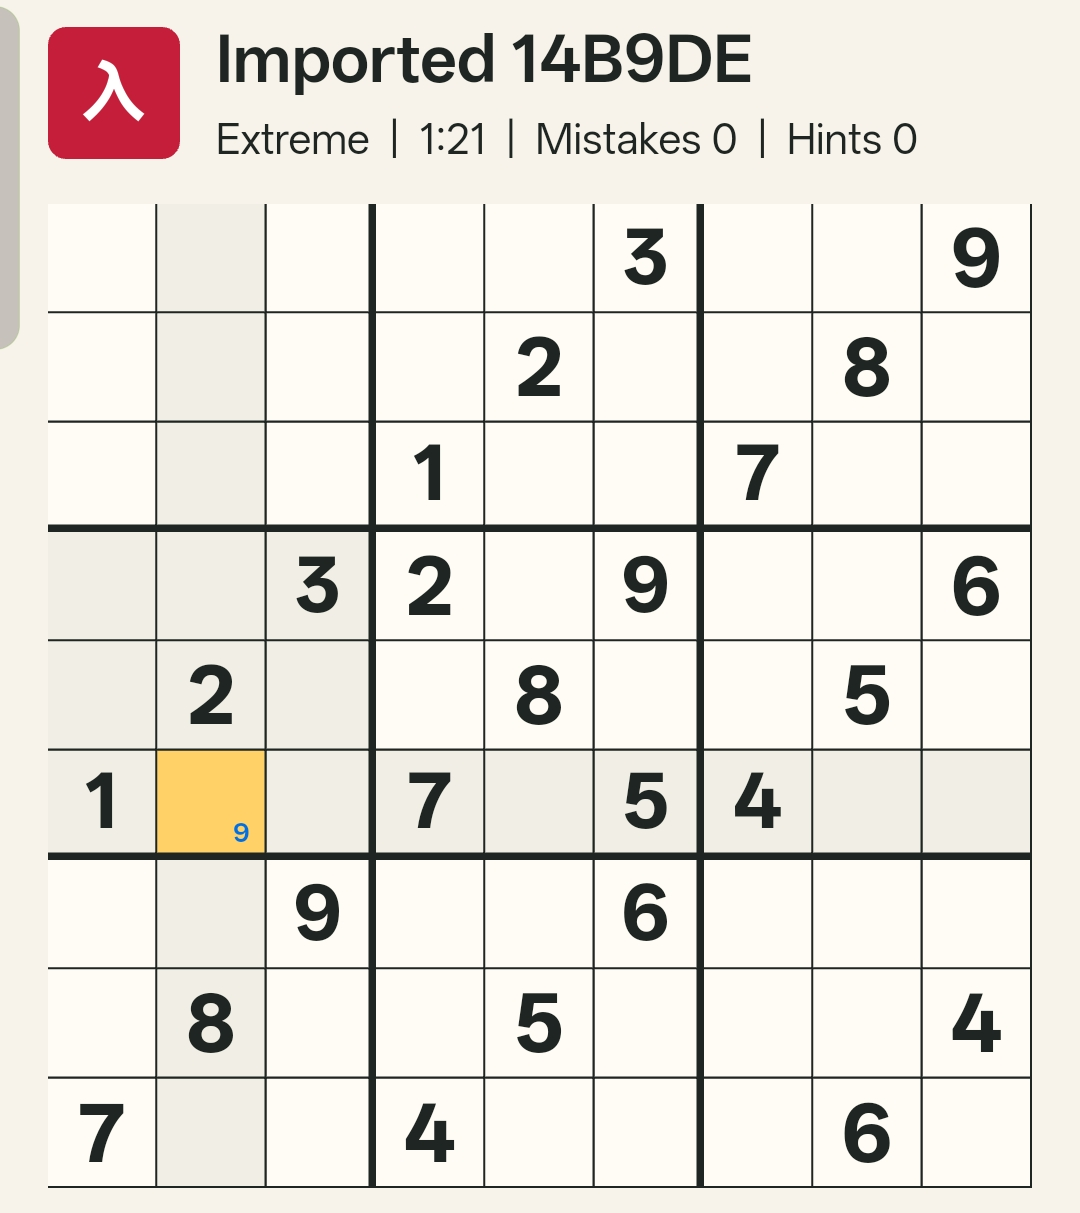
And then, reaching Box 3, the chain hits a wall.
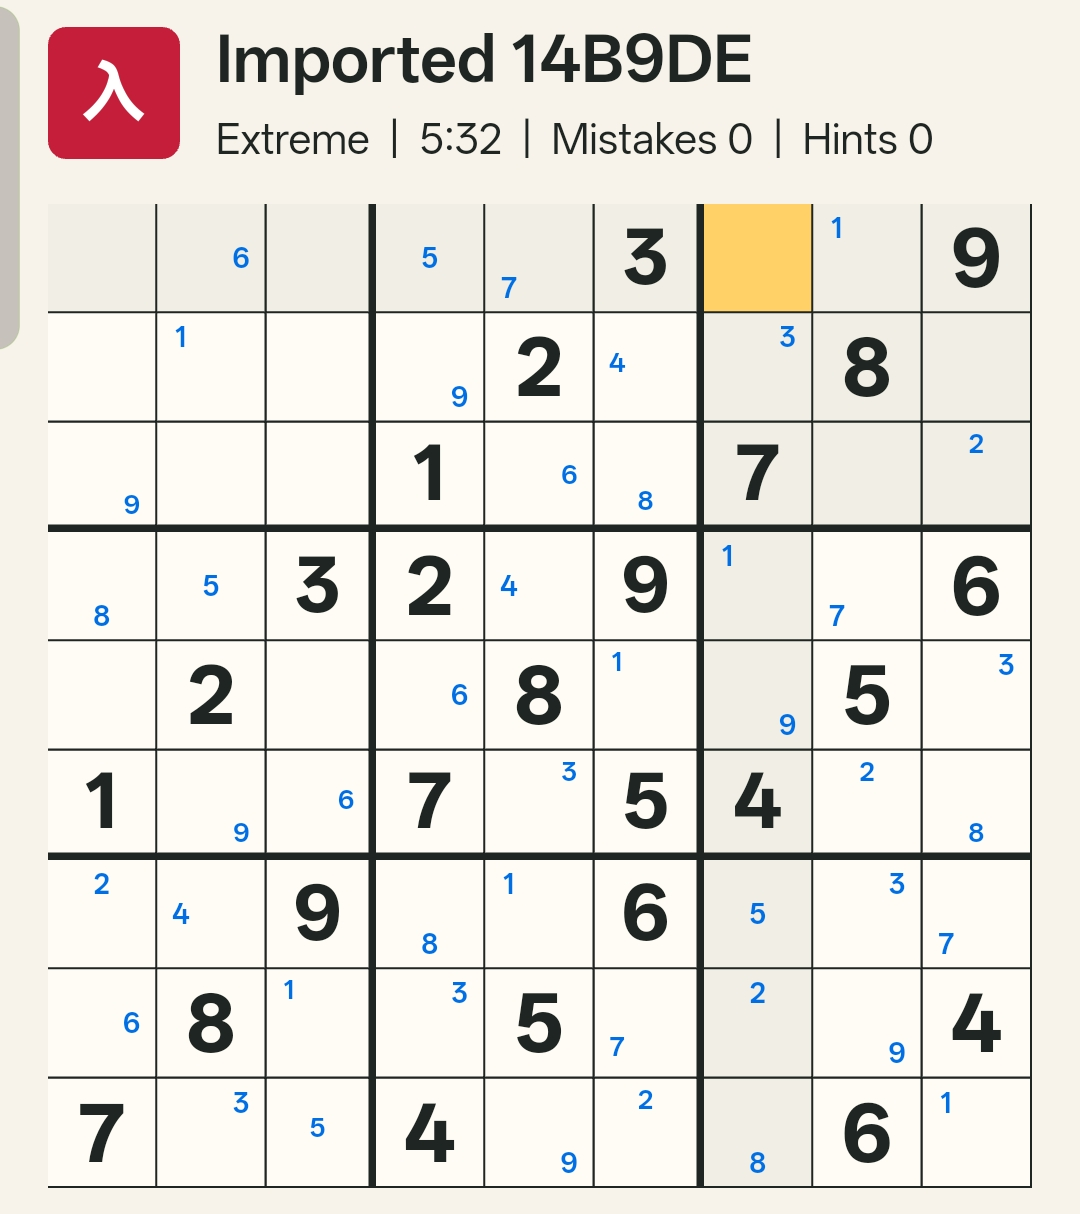
There is no valid cell for 6 in Box 3. The assumption was false. That means the opposite must be true: 9 belongs in the first candidate position in Box 4, not the second.
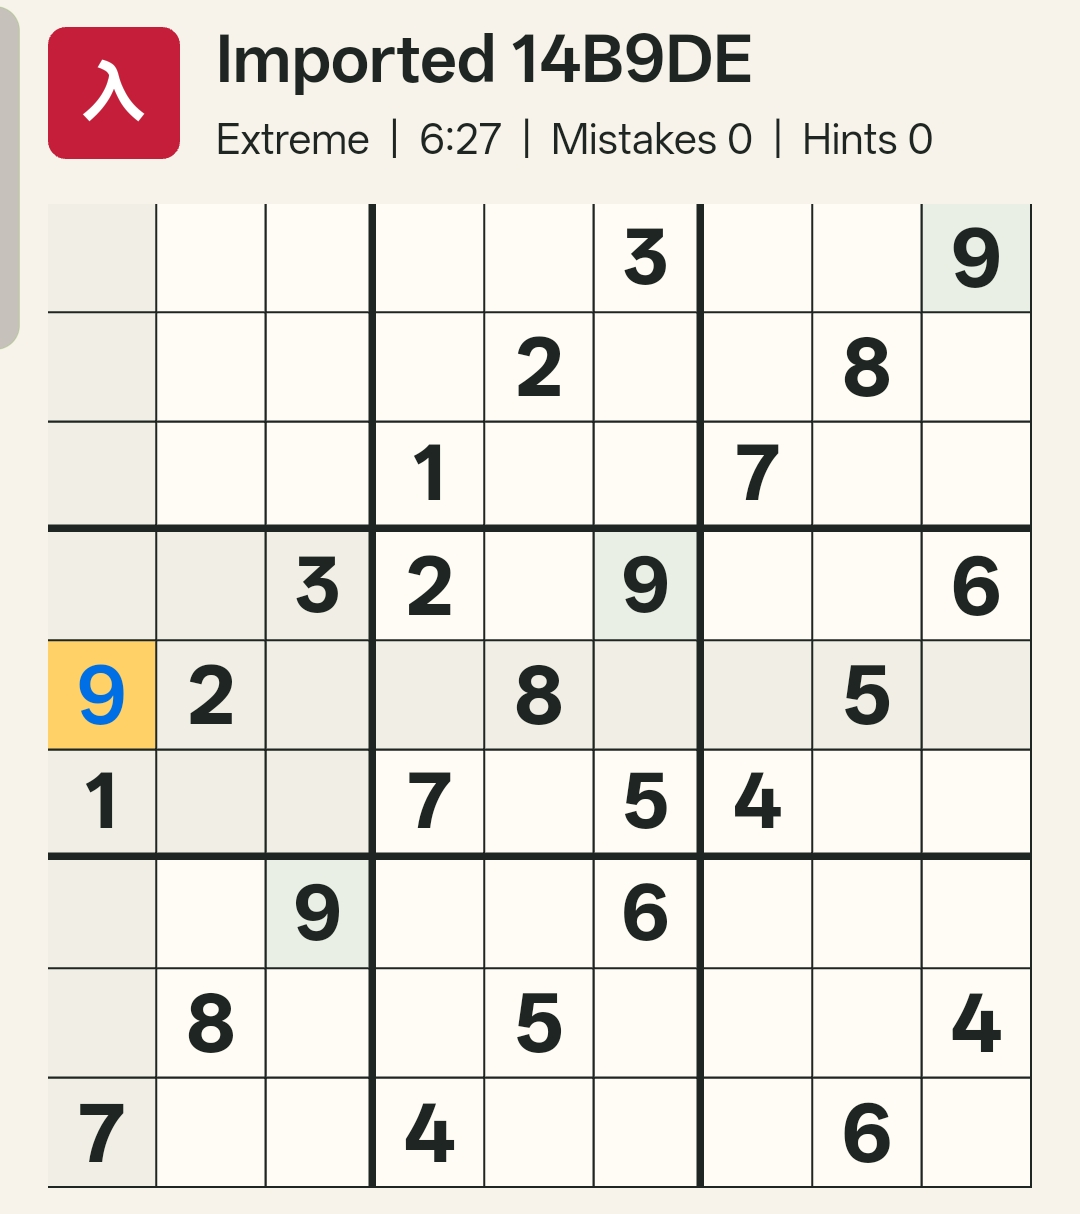
A handful of straightforward placements follow — and then the board stalls again. One proof by contradiction opened a small window, but not enough to solve the entire puzzle.
04 · Second
Second Fork: Box 2's Seven
With the first fork resolved, attention shifts to Box 2, where the digit 7 faces a similar binary choice: two candidate cells, no others.
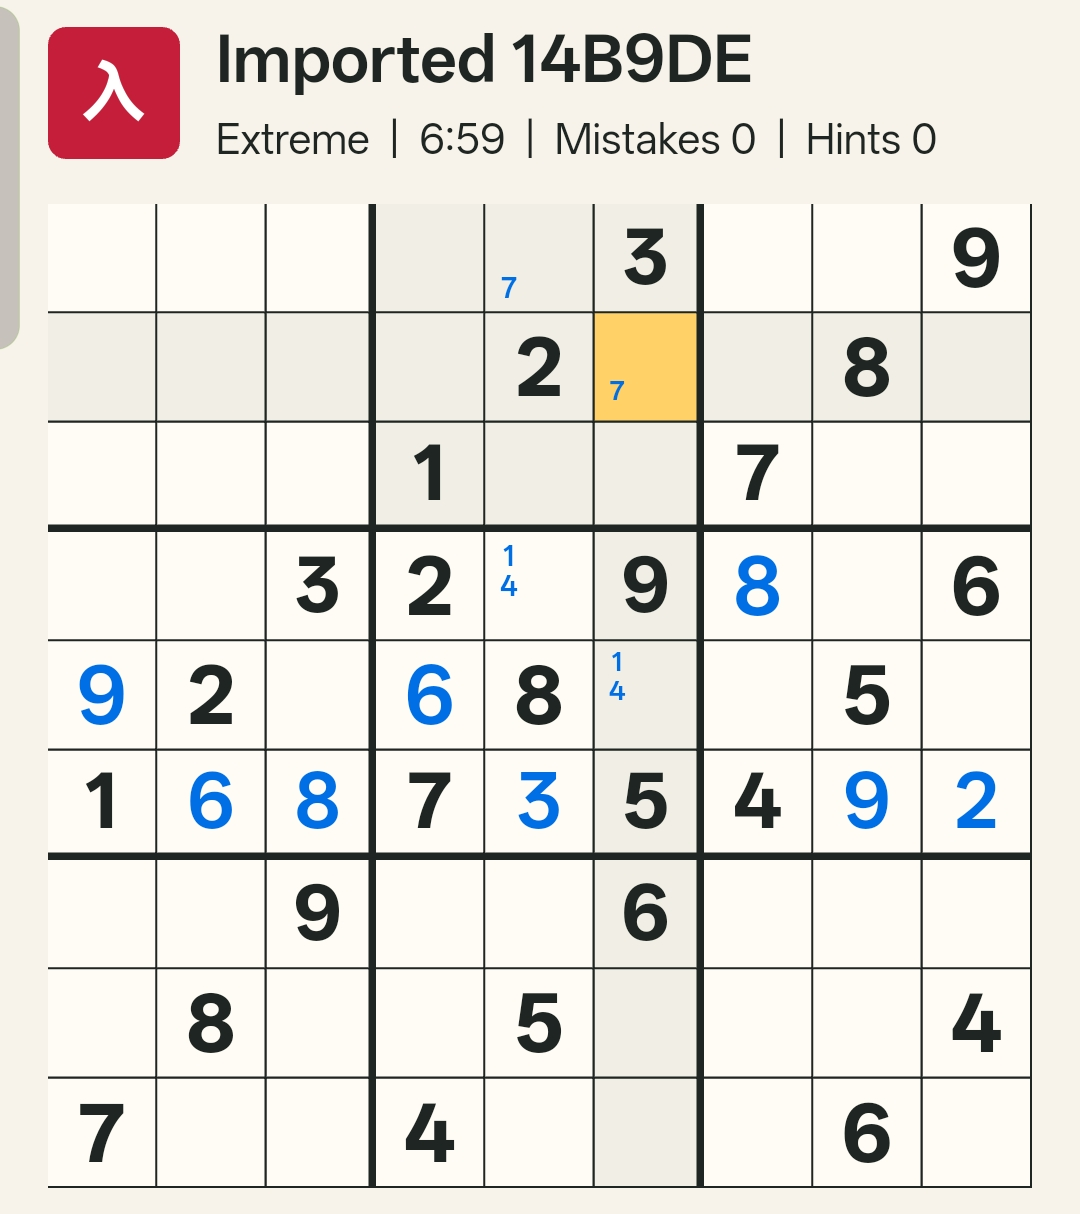
By the same reasoning as before, one candidate looks more promising as a chain trigger. Penciling it in and following the forced chain forward, a second long cascade unfolds across the grid, each placement locking in the next via cross-hatching.
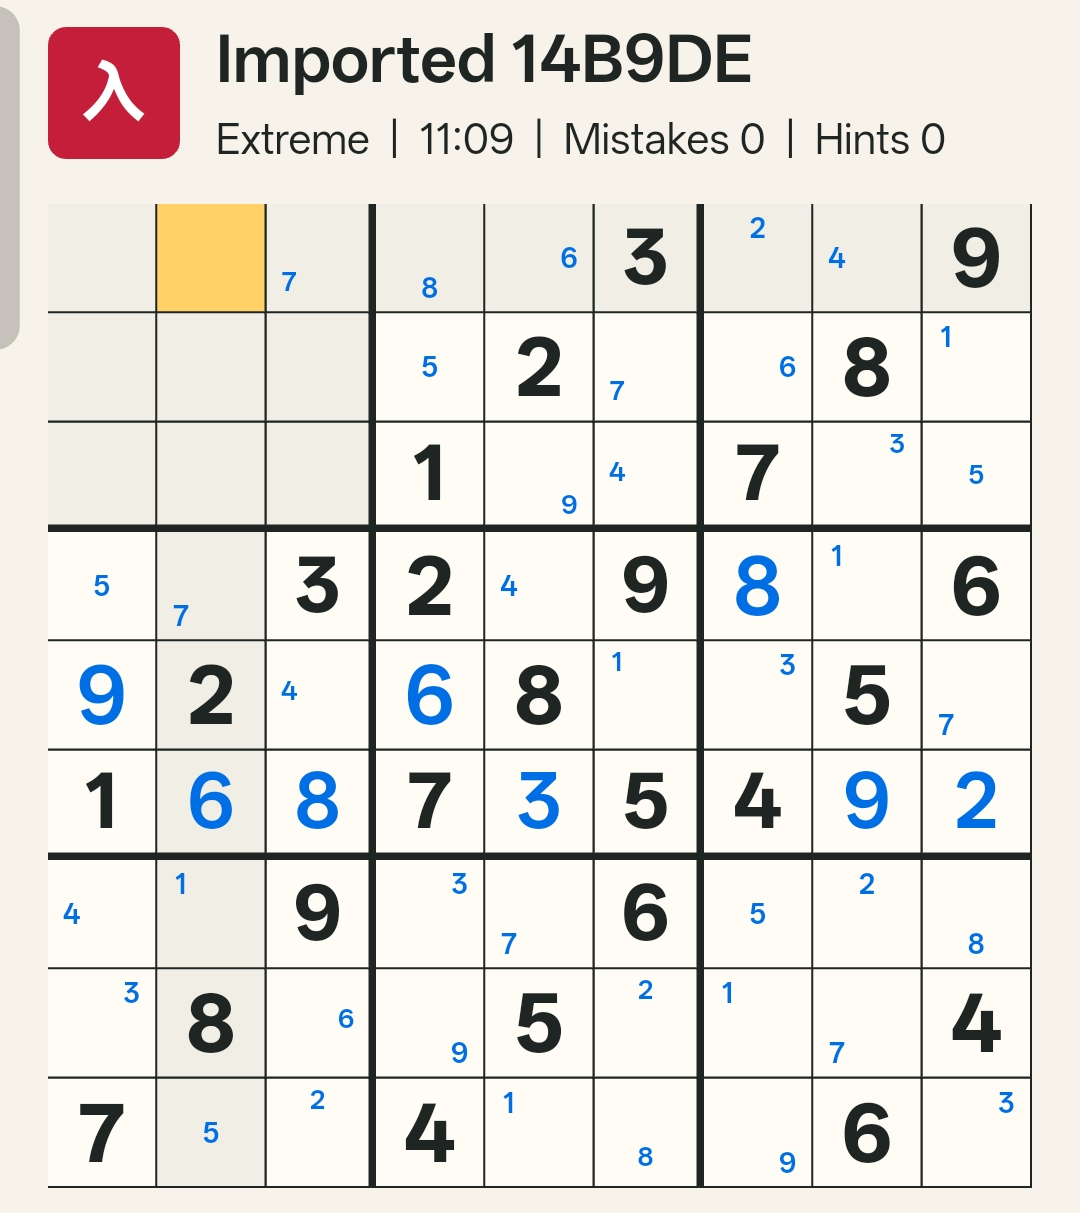
Once again, the chain reaches a conflict.
05 · Breakthrough
The Breakthrough
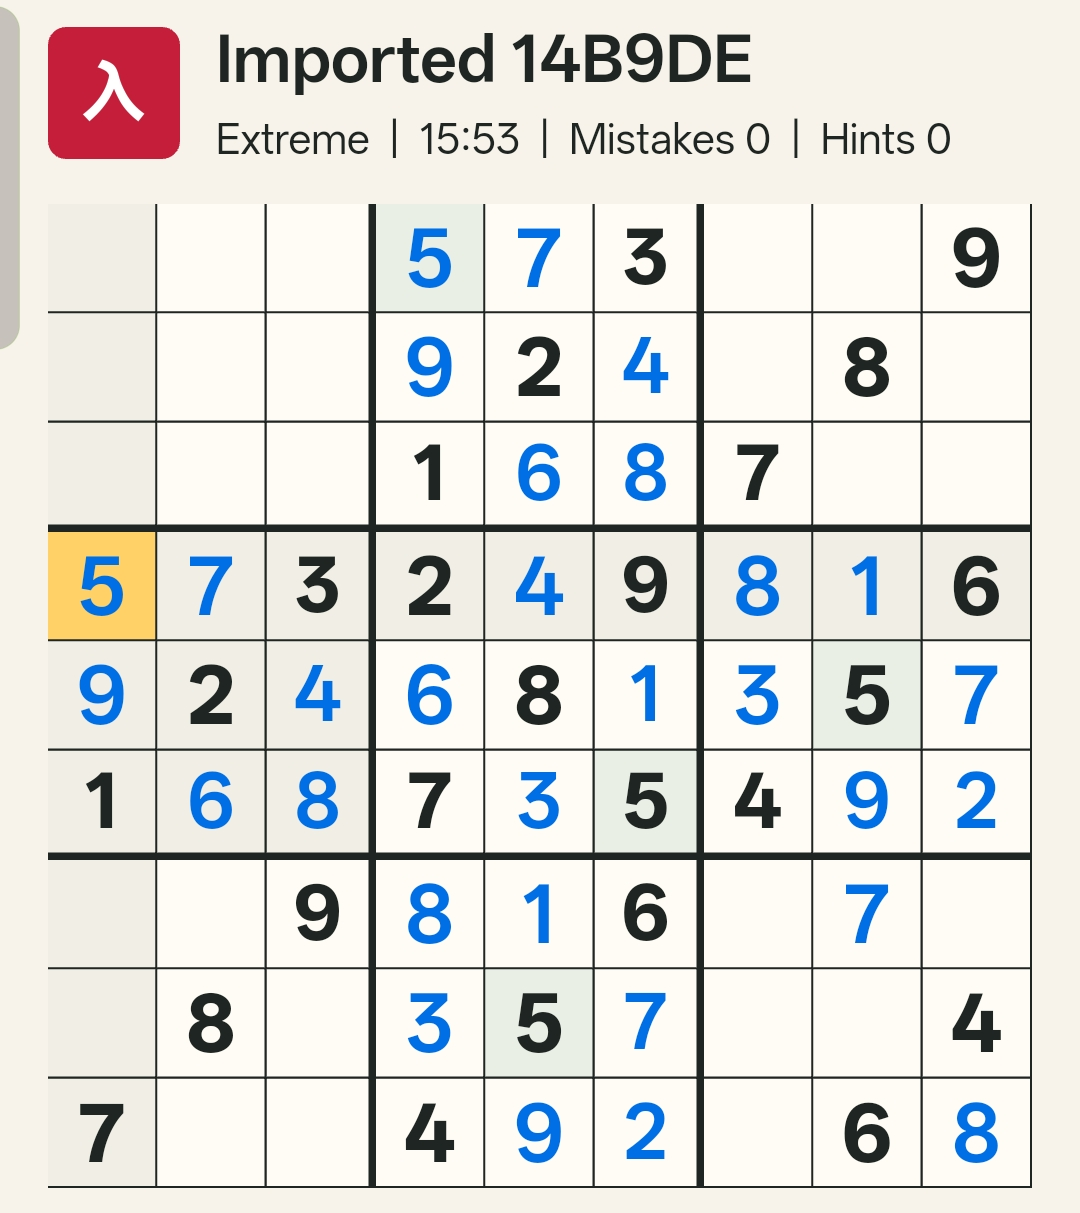
This time, the contradiction appears in Box 1: no valid position remains for the digit 5.
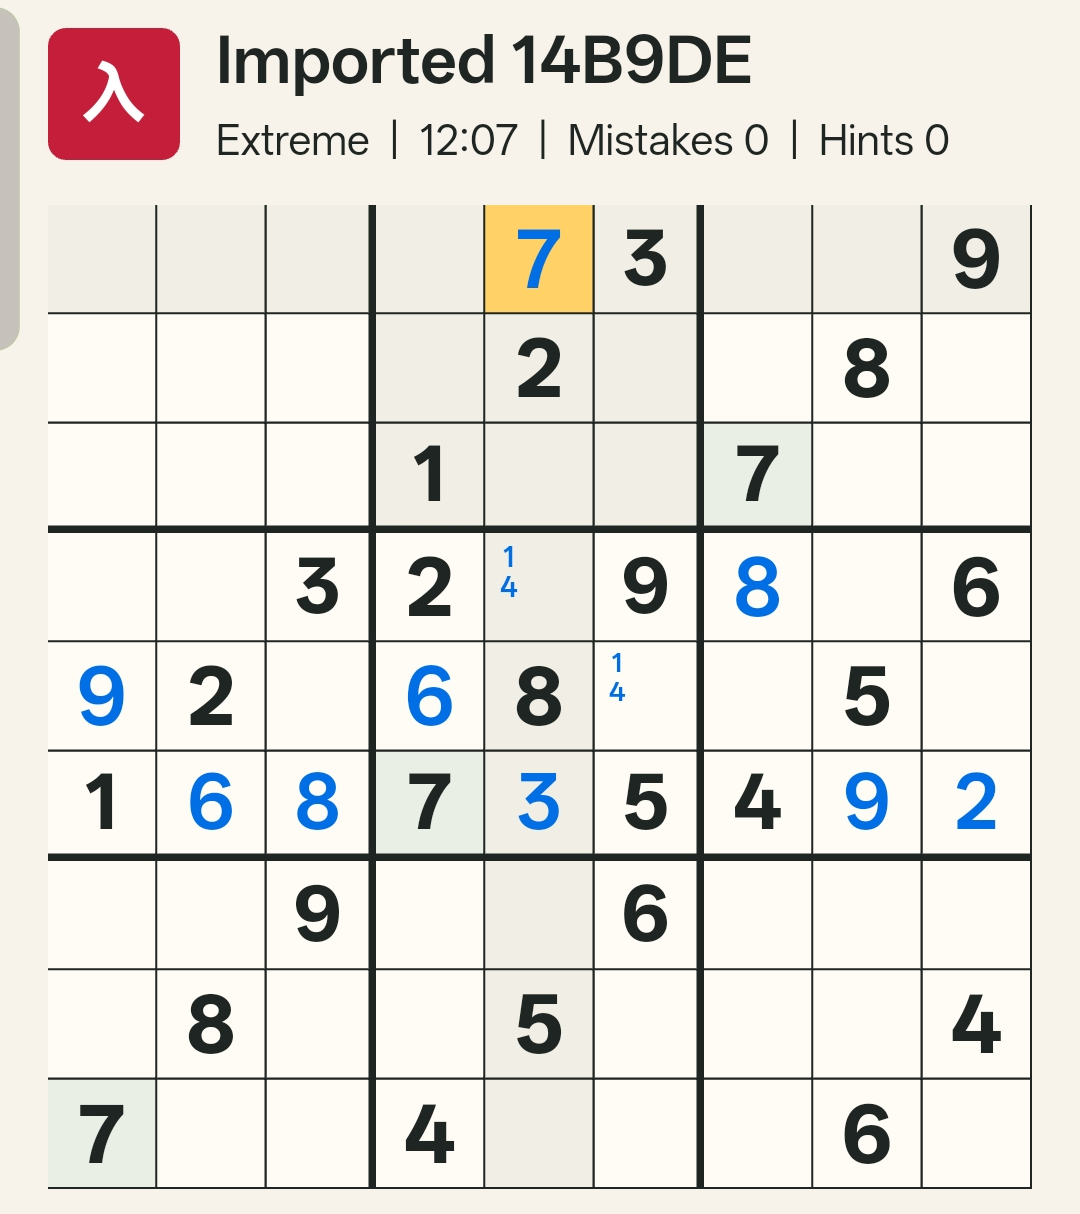
With both 9 and 7 now locked in — one in Box 4, one in Box 2 — the puzzle's entire character shifts. What was a Hell-tier wall becomes a straightforward solve path. The confirmed digits cascade outward, opening clean cross-hatching routes across the rest of the grid.
06 · Takeaway
The Ibtree Advantage
Two forks, two contradictions, two confirmed placements — and a Hell-tier puzzle reduced to an approachable solve. The ibtree method didn't bypass difficulty so much as redirect it: instead of cataloging every advanced pattern the canonical path would demand, you identified the two most leveraged binary choices and traced each forward until one broke.
The creative leverage principle: when a puzzle offers no easy opening, look for the binary fork that brings the most of the grid into play when tested — the candidate whose assumption forces the longest, most interconnected chain. That chain is either your path forward or your proof that the opposite candidate is true.
This puzzle's beauty wasn't just its symmetry at the start — it was the clarity of its two key forks, and the decisiveness with which each contradiction fell. Some puzzles make you dance through twenty technique names. Others make you choose twice, trace carefully, and watch the contradictions speak for themselves.
Try it in your next solve
Find a Hell-tier puzzle with no easy opening, scan for its first clean binary fork, and trace one branch forward. Let the contradiction — or the confirmation — do the talking.
Start a Tea MomentReconstructed from a real personal Su-Pu replay and checked against the recorded grid. Spotted a step that doesn't hold up? Tell us — every Journal article carries an accountable byline and an open correction channel.